Seguidores

jueves, 23 de noviembre de 2023

De vuelta. Mi casa Boho 2.0 terminada

 Hola, 

Primer post del 2023 y en Noviembre... 🙈

La verdad es que este año le he dedicado poco tiempo a las miniaturas, pero no he estado desvinculada del todo porque sigo participando en nuestro grupo de FB.

Precisamente, estamos haciendo una escena conjunta de una tienda de decoración y por supuesto me he anotado. Esta ha sido mi aportación.

First post of 2023, in November... 🙈

The truth is that this year I have dedicated little time to miniatures, although I have not been completely disconnected as I still participate in our FB group.

Precisely, we are making a joint scene of a decoration store and of course I signed up. This was my contribution:

Otra pequeña cosa que hice fue un pequeño cuadrito para un nuevo bebé que ha llegado a nuestra familia, nuestro cuarto nieto, el primer bebé de la 2ª hija de mi marido, fue mi manera de decir, bienvenido Kyliam!

He de decir que yo solo acomodé las miniaturas, todos los elementos han sido regalos que he recibido a lo largo del tiempo de compañeras de miniaturas.

Another little thing I made was a little frame for a new baby in our family, our fourth grandchild, the first baby of my husband's 2nd daughter, it was my way of saying, welcome Kyliam!

I have to say that I only arranged the miniatures, all the elements are gifts that I received over time from fellow miniaturists.


También terminé mi casa Bohemia 2.0 con la terracita de la primera planta y la fachada. Ya había mostrado aquí todas las habitaciones interiores, pero siendo esta mi última casa y una de mis favoritas, se merece que termine con broche de oro, mostrándola al completo. Primero os muestro la terraza que fue lo último que hice.

I also finished my Bohemia house 2.0 with the terrace on the first floor and the facade. I have already shown all the interior rooms here, but this being my latest house and one of my favorites, it deserves a proper ending to the project by showing it completed. First, let me show you the terrace, which was the last thing I did.


Lo único mío en esta terraza son las alfombras, el resto es producto de compras, regalos, como el juego de mesa y taburete que me regaló mi hijo e intercambios o sorteos como los soportes de las macetas en la pared que son de Ferlop quien trabaja maravillosamente la forja.

Como podéis vislumbrar en la última foto, la fachada la cambié pintando la 1ª planta y forrando la planta baja con papel de ladrillo con textura que queda muy guay, sin tener que poner ladrillos uno a uno, lo que no estaba dispuesta a hacer, jaja.

De resto adorné la fachada con flores plásticas que compro en los bazares cuando encuentro pequeñas y guardo por si acaso. En este caso, adornan esta fachada y aunque seguramente flores hechas de kits y en fimo o papel queden más bonitas, a mí por el menor esfuerzo que significan me vale y lo más importante, me gusta. Además de que no estoy dispuesta a sacrificar flores de ese tipo en fachadas a la intemperie y expuestas al polvo.

The only things that I made on this terrace are the rugs, the rest is a product of purchases, gifts, like the table and stool set that my son gave me and exchanges or giveaways like the pot holders on the wall that are by Ferlop who works  the forge beautifully.

As you can see in the last photo, I changed the facade by painting the 1st floor and covering the ground floor with textured brick paper that looks very cool without having to put bricks on one by one, which I was not willing to do, lol.

For the rest, I decorated the façade with plastic flowers that I buy when I find small ones and keep them just in case. In this case, they decorate this façade and although surely flowers made from kits and in fimo or paper are more beautiful, for me it is worth it because of the less effort they require and most importantly, I like it. Besides, I am not willing to sacrifice flowers of that type on facades exposed to the elements and dust.


Así ha quedado. Y así era:

This is how it is. And this how it was:


Ahora permítanme mostrarles muuuuchas fotos y cada estancia una a una que aunque ya lo he hecho antes, me ha apetecido hacer fotos actualizadas, siempre se cambia alguna cosa. Así de paso cerramos como corresponde a este proyecto, cuyo resultado, por qué no decirlo, me ha encantado. Es cierto que faltan cortinas, pero si o cuando las ponga, creo que solo lo haré en el dormitorio, en mi casa no las hay y así lo prefiero. Os dejo con las fotos.

Now let me show you many photos and each room one by one. Although I have done it before, I wanted to take updated photos, something always changes. And just like that this project is properly closed, the result, why not say it, I love it. It is true that curtains are missing, but if/when I put them up, I think I will only do it in the bedroom, I don't have curtains in my real home and I prefer it that way. Let's see the photos.


Esto es todo de mi casa bohemia 2.0. 

Les adelanto que si todo sale bien, este año volveré a visitar la feria de Kensington y también estaré por aquí para el calendario de Adviento de Matxalen. Nos vemos pronto.

This is all from my bohemian house 2.0. 

I can tell you that if everything goes well, this year I will visit the Kensington fair again and I will also be here for Matxalen´s advent calendar. See you soon.

Abrazos y hugs


lunes, 19 de diciembre de 2022

Calendario de Adviento de Matxalen 2022/ Matxalen´s Advent Calendar 2022

 Hola!

Hoy es mi turno en el calendario de Adviento de Matxalen en el cual llevo colaborando desde 2018. Para mí es un honor y espero que les sea útil el tutorial que os traigo. Como veis en la foto superior, es un palet (en Tedy venden alguno, pero son un poco más grandes, un poco fuera de escala en mi opinión, aunque palets hay de muchos tamaños). Hoy en día los palets son muy populares en decoración y eso es lo que propongo con este, hacer un palet y convertirlo en una mesita moderna para adornar un rincón.

Today is my turn in Matxalen´s Advent calendar which I have been collaborating with since 2018. For me it is an honor and I hope that the tutorial that I bring you will be useful. As you can see in the photo above it is a pallet (Tedy sells some but they are bigger, a little bit out scale in my opinion,  but pallets come in many different sizes). Nowadays pallets are very popular in decoration and that is what I propose with this one, make a pallet and turn it into a modern coffee table to decorate a corner.

Empezamos/ Let´s start:

Los materiales utilizados son palitos de polos, pero como no encontré los míos jeje, utilicé estos palitos de pinchos que sí tenía, un listón de madera de 1cm de grosor, pegamento y 4 cuentas plásticas redondas que olvidé poner en la foto.

The materials used are popsicle sticks, since I couldn't find mine, lol, I used these sticks that I did have, a 1 cm thick wooden strip, glue and 4 round plastic beads that I forgot to put in the photo.


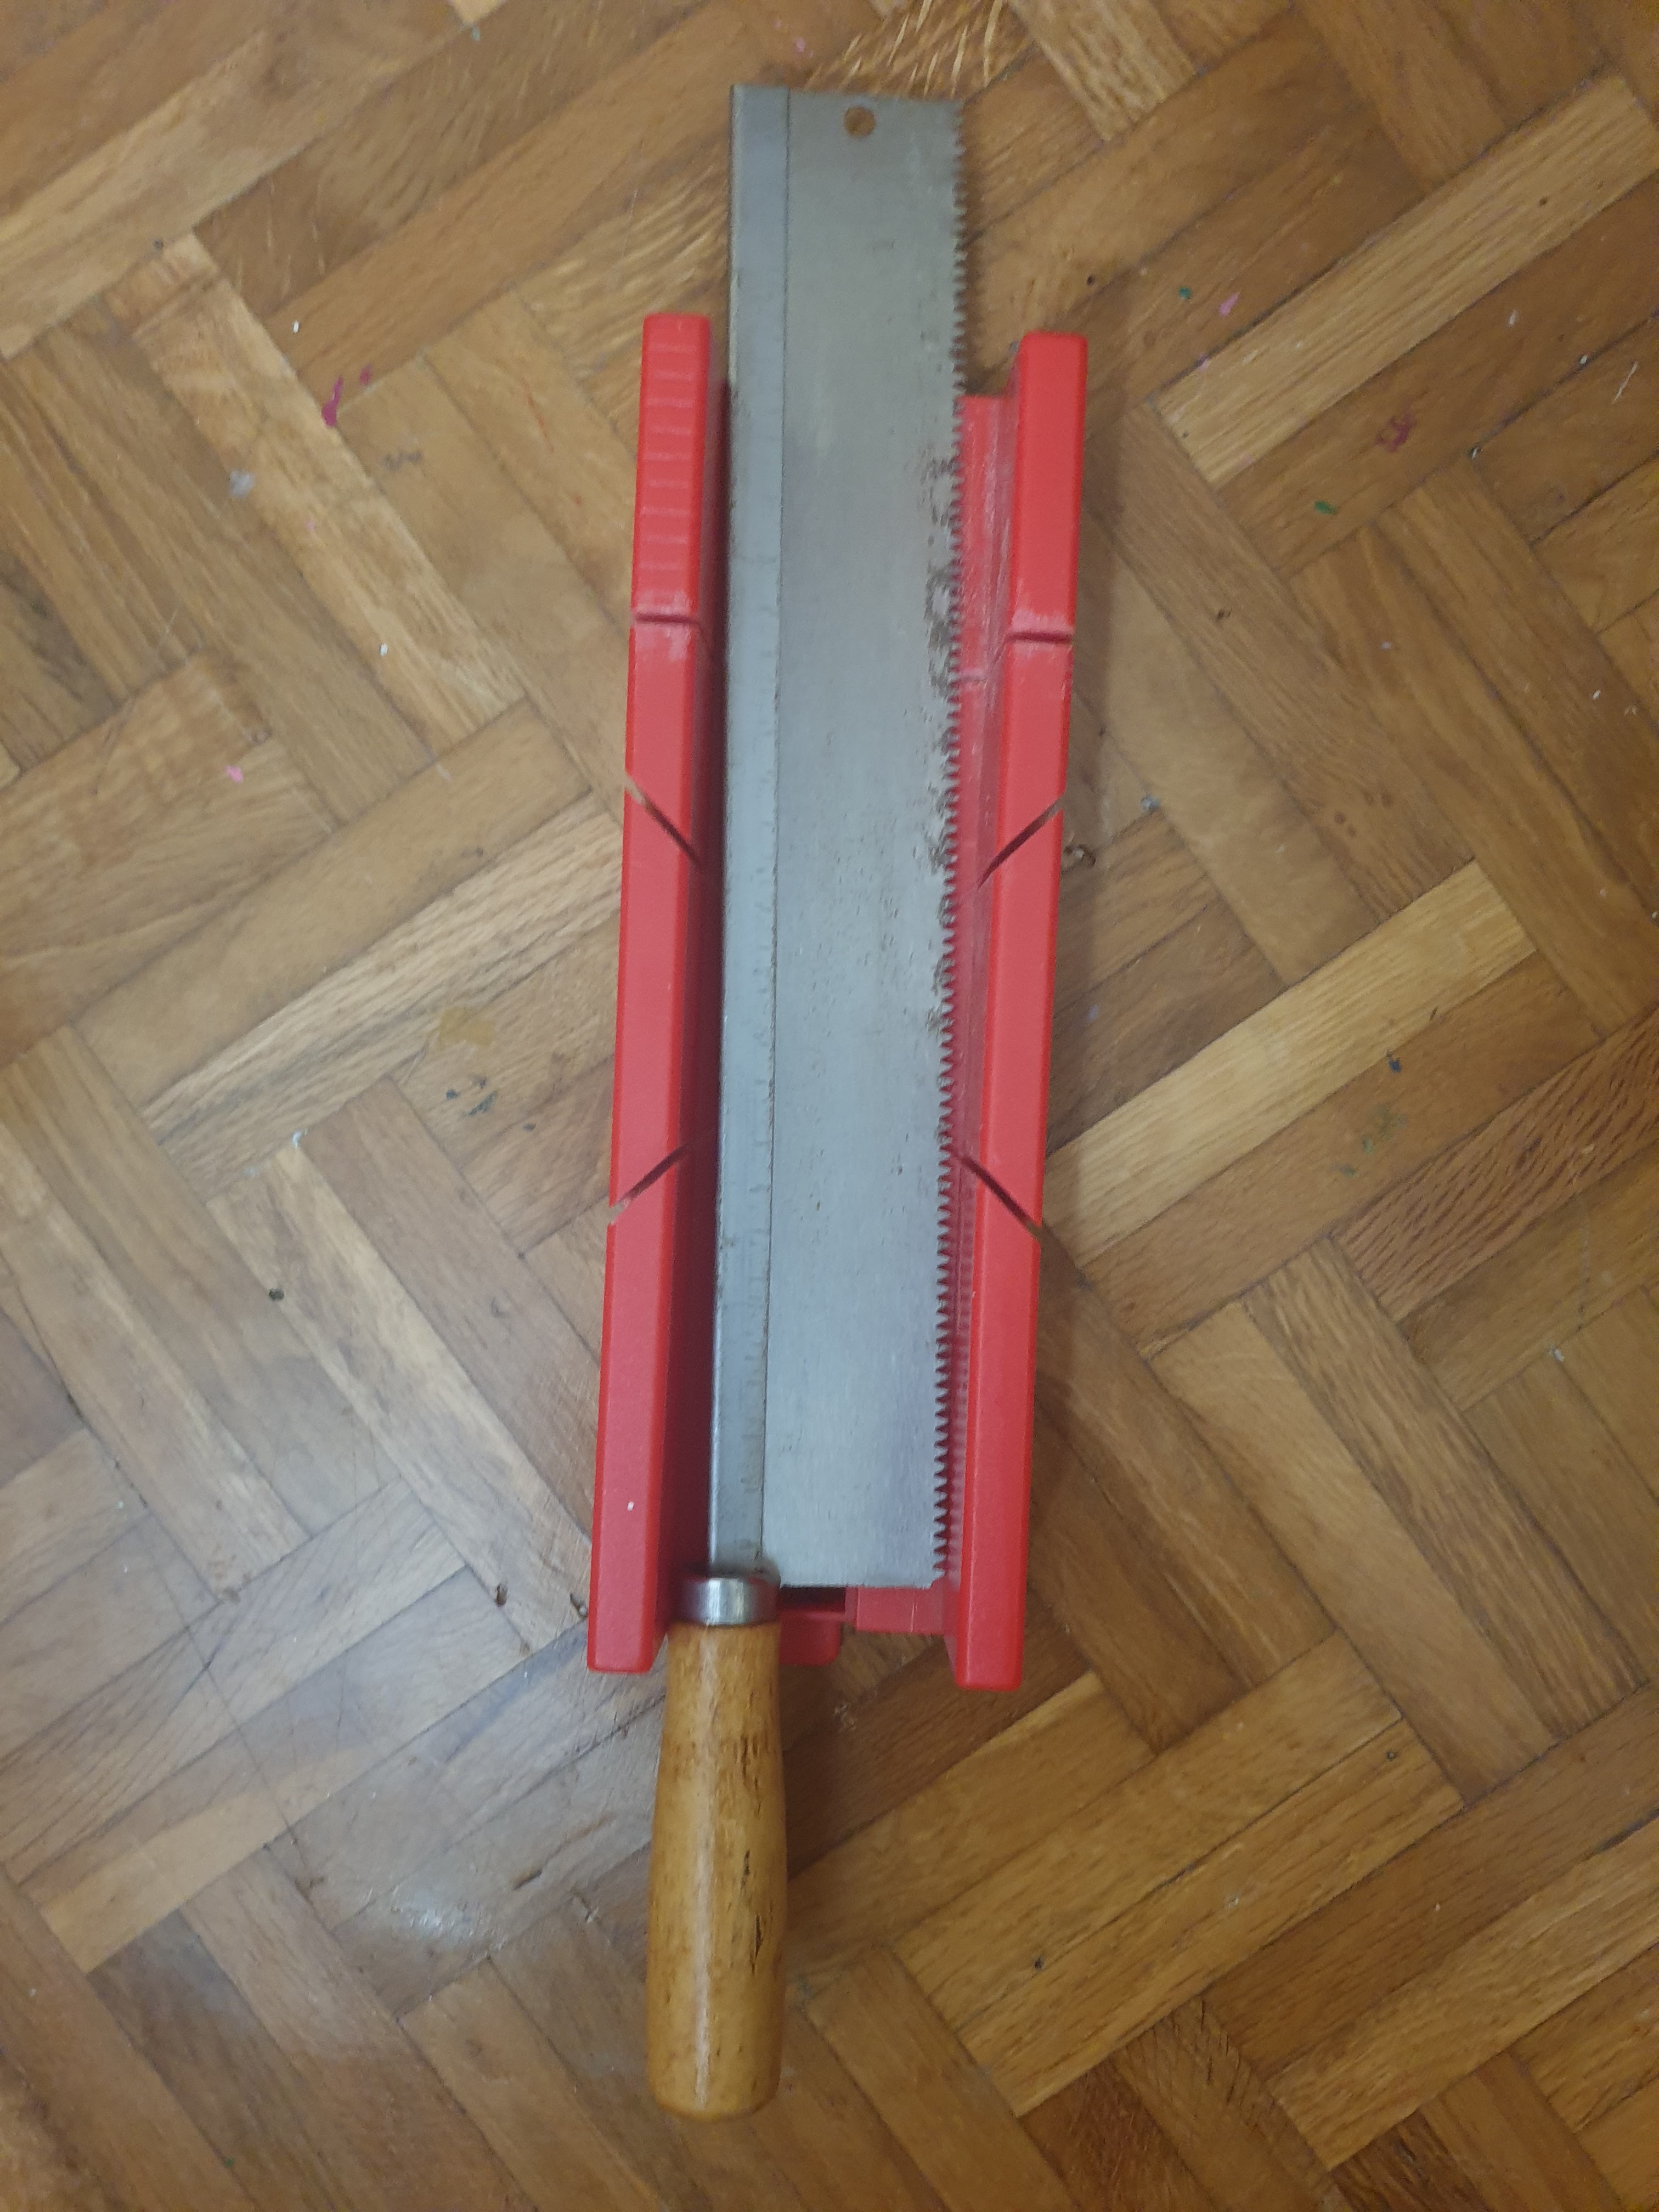
Las herramientas que usé son una segueta para cortar el listón de madera y cualquier otra herramienta que uséis para cortar los palos de polo, normalmente yo uso una tijera de jardinería que no sale en la foto.

The tools that I used were a hacksaw to cut the wooden strip and any other tool that you use to cut the popsicle sticks, normally I use gardening scissors that don't appear in the photo.


Lo sé, es muy grande, pero es la que tengo y hace el trabajo.

I know, it´s too big, but it´s what I have and does the job.

El primer paso es cortar 14 palitos de polo de 7 cm, una vez cortados lijar los bordes (olvidé poner lija entre los materiales 😁).

The first step is to cut 14 7 cm popsicle sticks, once cut, sand the edges (I forgot to put sandpaper among the materials 😁).
 

Luego cortar con la segueta el listón de madera en 6 piezas de 1cm, así quedarán piezas cuadradas de 1 cm x 1 cm. Lijar una vez cortados.

Then cut the wooden strip into 6 pieces of 1 cm with the hacksaw, so there will be square pieces of 1 cm x 1 cm. Sand once cut.


Ya estamos listos para empezar a pegar/ We are ready to start glueing.


Pegamos los cubitos de madera en cada extremo entre 2 palitos, como muestro en la foto.

We glue the wooden cubes at each end between 2 sticks, as I show in the photo.


Lo ideal es dejar secar el pegamento en cada paso, así no se os tuerce. Lo siguiente, una vez secas las piezas anteriores es pegarlas en tres palitos colocados a igual distancia, esta es la base del palet. Os muestro:

The ideal is to let the glue dry at each step, so the pieces don´t move . The next thing, once the previous pieces are dry, is to glue them on three sticks placed at equal distances, this is the base of the pallet. I'll show you:


Veis lo que os digo, como soy muy impaciente y quería tomar las fotos, no esperé a que el pegamento secara y se movió una pieza al moverla y tomar la foto. No os preocupeis, mientras el pegamento está mojado se puede corregir. Primero puse dos piezas y después la tercera para distribuirlas bien, así:

You see what I'm telling you, since I'm very impatient and I wanted to take the photos, I didn't wait for the glue to dry and a piece moved when I moved it for the photo. Don't worry, while the glue is wet it can be corrected. First I put two pieces and then the third to distribute them well, like this:


Hasta ahora hemos utilizado 9 palitos, así que por último pegamos los 5 palitos restantes encima (es decir, el orden es 3 palitos, sobre ellos las piezas con los cubitos y sobre ellos los 5 palitos restantes), los colocamos a igual distancia y ya está.

So far we have used 9 sticks, so finally we glue the 5 remaining sticks on top (that is, the order is 3 sticks, on them the pieces with the cubes and on them the 5 remaining sticks), we place them at equal distance and that's it is.


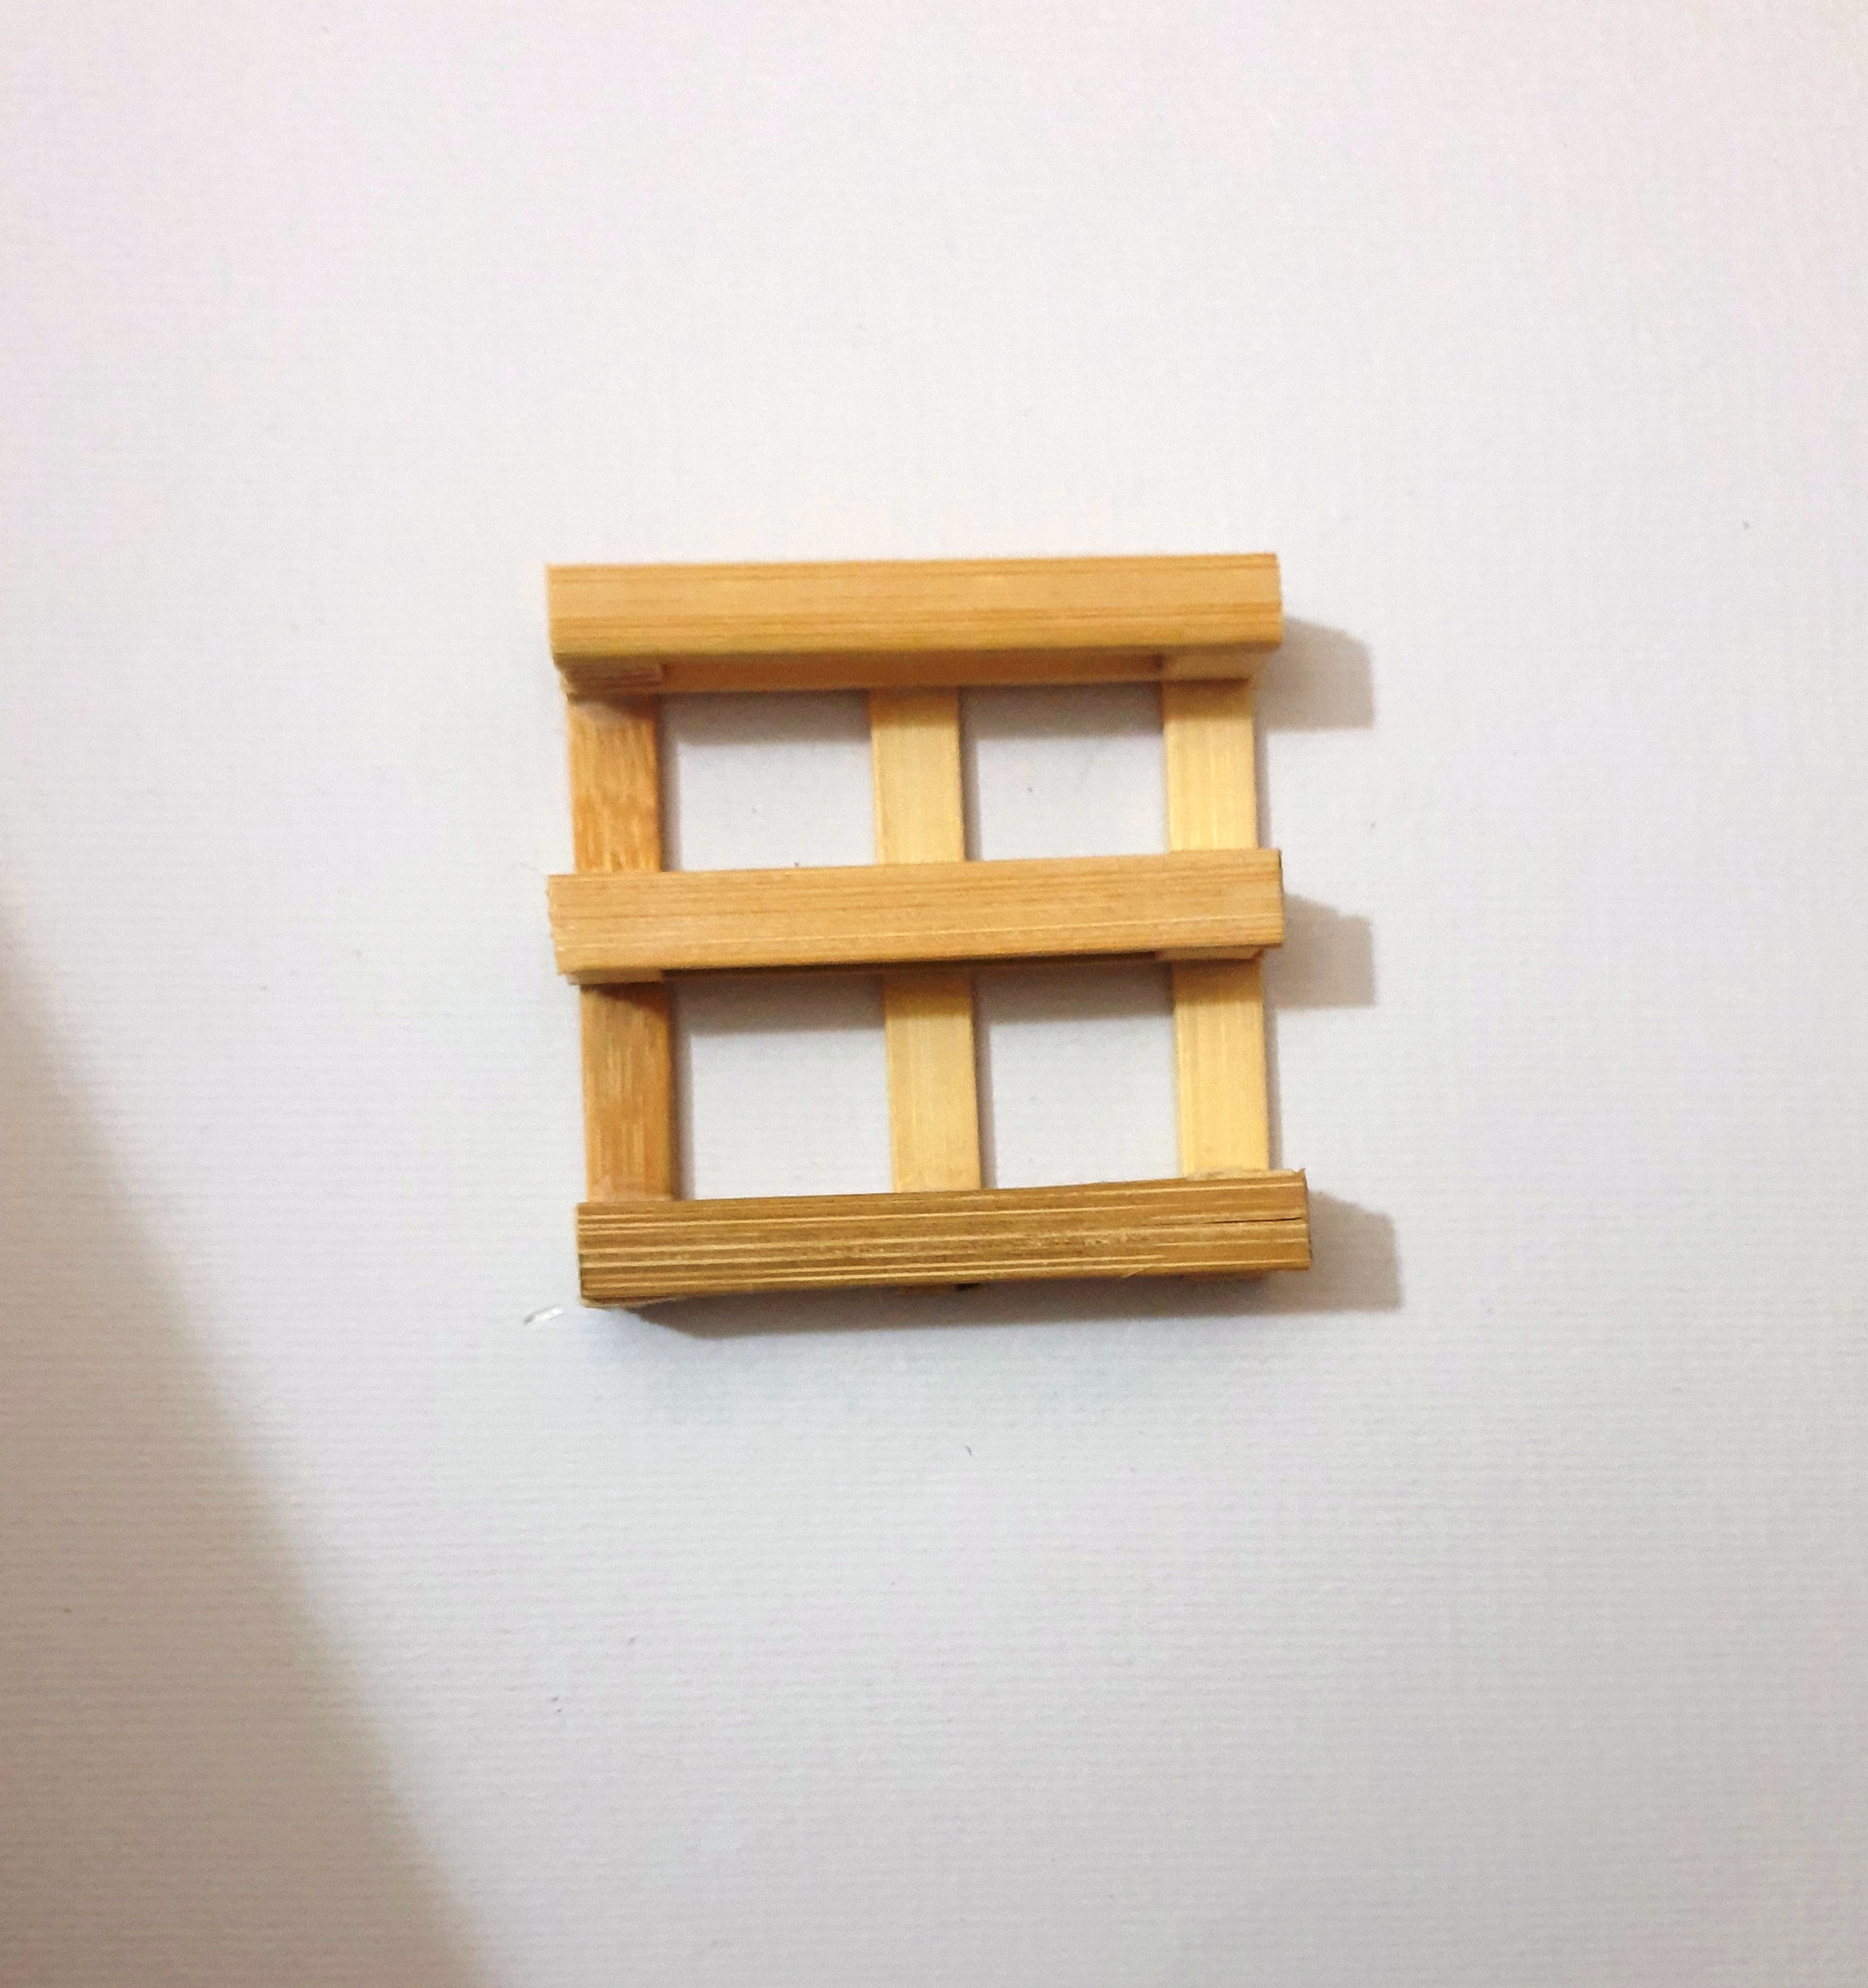
Lo veis? Aquí ya tenemos nuestro palet terminado. 

Esta próxima foto es un intento por ilustrar cómo van las capas por si acaso no lo he explicado bien.

Do you see it? Here we have our finished pallet.

This next photo is an attempt to illustrate how the layers go just in case I haven´t explained it very well.


Y como os dije que la idea es utilizar el pallet como mesita, le pegamos las 4 cuentas redondas a modo de patas de rueda:

And since I told you that the idea is to use the pallet as a small table, we glue the 4 round beads on it as wheel legs:


Y así queda:

Ahora solo falta colocar en su sitio y decorar.

And so this is the result:

Now all that remains is to place it in its place and decorate.


Os gusta? Espero que sí y que os haya parecido útil y os animeis a hacerla es muy fácil y resultona y puede ir muy bien en una casita moderna. Esto es todo.

Do you like it? I hope so and that you have found it useful and are encouraged to do it, it is very easy and successful and it can go very well in a modern house. This is all.


Les deseo unas fiestas maravillosas y que el 2023 sea un año positivo para todos. Mucha salud, amor y bienestar. 

I wish you happy holidays and may 2023 be a positive year for all of you. Lots of health, love and well-being.

Alex 😘😘😘