Hola!!
Espero que estéis teniendo un inicio de diciembre y Navidad seguro y agradable. Yo nuevamente por aquí participando en el calendario de Adviento que Matxalén organiza cada año, esta es mi tercera participación. Gracias Matxalén por contar conmigo una vez más.
A lo que vamos, siempre estoy buscando ideas en Internet para hacer en mini, tenía unas botellas de vino muy grandes pero chulas y Pinterest que siempre es buena fuente de inspiración me muestra esto:
I hope you are having a safe and enjoyable start to December and Christmas. I am here again participating in the Advent calendar that Matxalen organises every year, this is my third participation. Thanks Matxalen for having me one more time.
Let´s start, I'm always looking in Internet for ideas to make in mini, I had some big but cool wine bottles and Pinterest, which is always a good source of inspiration, shows me this:
Chulo, no? Bueno a mí me lo parece. Los materiales que necesitaremos son unas tablitas de madera o cartoncillo, las mías son pedacitos sobrantes que tenía de madera de balsa, estas son de 6 cm x 2 cm; botellas, como son para un elemento decorativo que va en la pared no importa mucho el tamaño y papel aluminio o cartoncillo (que se pueda moldear) pintado en plateado.
Cool, right? Well, i think so. The materials that we will need are: some wooden or cardboard boards, mine are leftover pieces of balsa wood I had , these are 6 cm x 2 cm; bottles, as they are for a wall decorative element, it does not matter much the size and aluminium foil or cardboard (that can be shaped) painted in silver.
El papel se va doblando para que tenga un grosor adecuado. Ir pegando con pegamento en barra al ir doblando. Al final os debe quedar una pieza de unos 2mm de ancho.
Luego teñimos la madera o pintamos el cartoncillo a nuestro gusto.
The paper is folded to a suitable thickness. Glue it with glue stick when folding. At the end you should have a piece of about 2mm wide.
Then stain the wood or paint the cardboard to your liking.
Pegamos la botella a la madera. En este caso al ser plástico sobre madera de balsa utilicé pegamento de modelismo y funcionó perfecto.
Glue the bottle to the wood. In this case, being plastic on balsa wood, I used modelling glue and it worked perfectly.
Con la botella pegada cortamos un trozo de nuestro papelillo doblado y lo pegamos alrededor del fondo de la botella y otro trozo alrededor del cuello a manera de agarraderas, en la foto se ve mejor. Aquí utilicé cola blanca.
With the bottle glued we cut a piece of our folded paper and stick it around the bottom of the bottle and another piece around the neck as handles, in the photo you can see better. Here I used white glue.
Una vez terminamos decoramos a nuestro gusto, yo he utilizado musgo y unas flores que tenía.
Once finished, decorate it to your liking, I used moss and some flowers I had.
¿Os gusta? Ahora que veo en la foto, caigo en cuenta que quedaría bien despegar la etiqueta y volverla a pegar al revés que en este caso sería al derecho😁, otra idea sería quitarla como en la foto de inspiración. Yo se las he dejado porque me gustan así también.
Do you like it? Now , seeing the photo, I realise that it would be good to peel off the label and stick it downwards, which in this case would be to the upwards😁, another idea would be to remove it as in the inspiration photo. I have left them because I like them that way too.
Podéis hacer uno o varios y utilizar juntos o individualmente.
You can make one or several and use together or individually.
Yo he utilizado dos que quise ubicar en mi casa moderna.
I have used two that I wanted to place in my modern house.
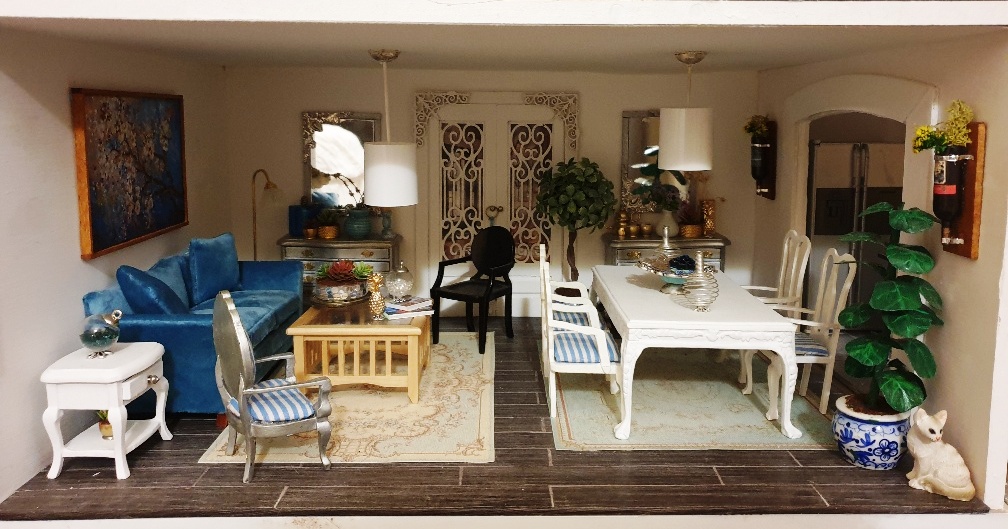
Al final quedaron ubicadas en esta pared entre la cocina y el salón comedor. Me gusta mucho como quedan, creo que se ven modernos y dan un toque original.
They ended up on the wall between the kitchen and the dining room. I really like how they look, I think they look modern and give an original touch.
Y es todo, espero que os sirva la idea y os animéis a hacer el tutorial que es muy fácil.
Como es mi costumbre desde que empecé a participar en este calendario voy a sortear un ejemplar de los que he hecho (el de la foto debajo). Cómo participar es lo mismo de siempre, asegúrate de ser seguidor del blog y deja un comentario en esta entrada. El ganador lo elegiré al azar el próximo día de Reyes, 6 de enero.
And that's all, I hope the idea helps you and you try the tutorial, it is very easy.
As the tradition since I began to participate in this calendar, I am going to giveaway one sample of the ones I made (the one in the photo below). How to participate is the same as always, make sure you are a follower of the blog and leave a comment on this post. The winner will be chosen at random on the next Kings Day, January 6.
Es todo, os deseo una Feliz Navidad, sobre todo mucha salud para vosotros y sus seres queridos, cuidaos mucho y que aunque no podamos tener grandes reuniones y celebraciones tengamos cosas que agradecer, compartir y con quien hacerlo. Felices fiestas!
That's all, I wish you a Merry Christmas, especially good health for you and your loved ones. Take good care of yourself and although large meetings and celebrations are not allowed or recommended, may you have things to be thankful for, to share and loved ones to do it with. Happy Holidays!
Lots of love xxx
Alex ❤🎄😘🎄❤


Muchas gracias por el tutorial. Es fácil y queda muy bien. Feliz Navidad y cuídate mucho!!
ResponderEliminarUn tutorial muy, muy original, quedan geniales, muchas gracias por el esfuerzo. Feliz Navidad para ti y los tuyos
ResponderEliminarEstupendo, fácil y original, muchas gracias y felices fiestas, un abrazo, Blanca.
ResponderEliminarGracias, igualmente.
ResponderEliminarBesitos
Qué bonito queda, me encanta el resultado y también tú blog, no lo conocía. Ya me hice seguidora, ahora voy a dar una vuelta a ver tus cositas. Gracias por el tuto, está fácil, a ver si lo intento. Besos
ResponderEliminarMuy chulo, muy buen reciclaje, subo enlace a mi blog. Graciasss
ResponderEliminarWhat a lovely tutorial! Thank you, Alex.
ResponderEliminarPlease include me for your giveaway. There will be a link on my blog.
Merry Christmas and a Happy New Year to you and yours.
Hugs, Drora
Queda genial, gracias por compartir. Un beso
ResponderEliminarTeredu
This is a great tutorial, thank you for sharing, Alex!! The bottle and flower decorations look wonderful at the walls in your dollshouse, very original.
ResponderEliminarMerry Christmas and Happy New Year to you and yours.
Stay safe, take care, dearest Alex.
Besos/Hugs, Ilona
Precioso tutorial, me encanta cómo queda, ten por seguro que lo haré en algún momento!! Muchas gracias.
ResponderEliminarBesos.
Me ha encantado 👏👏 quedan monísimas las botellas así.
ResponderEliminarMuchas gracias por el tuto.
Besotes
Que idea más chula Alex.. Este habrá que hacerlo, esta genial muchas gracias. Feliz Navidad. Un abrazote
ResponderEliminarPues si, una idea genial gracias por enseñarlo. Feliz Navidad. Besos
ResponderEliminarGenial!!! Es súper original, además. Yo no cambiaría la etiqueta de posición, fíjate, después de todo es obvio que la botella está boca abajo, no tendría sentido poner la etiqueta del revés. Me gusta muchísimo cómo queda en la pared del comedor, encajan a la perfección ♥ También es una idea perfecta para jardines, terrazas, invernaderos, no te parece?
ResponderEliminarSorteo???? Soy adicta, mija, jaaaa! Te llevo a mi blog y también te deseo lo mejor para Navidad y 2021. Un abrazo, Alex!!! ♥
Ohhhh q detalle tan divino!
ResponderEliminarMe encanta!
Gracias x compartir!
Alexandra, me parece un tutorial fácil y original. A tí te van de maravilla en ese salón moderno. Estoy con Elena en que irían estupendas en una terraza también.
ResponderEliminarMuchas gracias por tu colaboración en el calendario.
Espero que tengas unas felices fiestas. Un beso
Un bonito y decorativo detalle, además original por lo de estar puesto al revés.
ResponderEliminarSubo el enlace a mi blog.
Felices fiestas
Muy original. Me parece una monada.
ResponderEliminarEstupendo tutorial, gracias por compartir.
ResponderEliminarFelices Fiestas
Ana (analabea)
Queda genial y es muy sencillo.
ResponderEliminarGracias por compartir.
Feliz Navidad.
Merry Christmas Alex! Love the wine bottle vase idea! And I agree it makes a fun, interesting and modern touch to your mini home. I love a quirky idea!
ResponderEliminarGracias por el tutorial.
ResponderEliminarEs un adorno genial.
Un saludo
Wonderful tutorial and original miniature.
ResponderEliminarPlease, count me in your giveaway.
Merry Christmas!
Me rechifla Alex....me parece un adorno con mucha personalidad, ideal para cualquier rincón.
ResponderEliminarUn besin.
¡Qué chulo! Dan ganas de ponerse a ello ahora mismo
ResponderEliminarMuy bonito! Gracias por el tutorial. Lo intentaré hacer.
ResponderEliminarThis is a fantastic tutorial - a great idea transformed into a stunning miniature... and very well explained. I will add this idea to my long One-day-I'm-going-to-do"-list... and I already foresee possibilities for variations, like for example creating labels with seasonal pictures on or using jars... thanks for the inspiration!
ResponderEliminarMerry Christmas to you and yours and best wishes!
Birgit
(who is a bit worried because my other packages to Spain sent at the same day have already arrived - fingers crossed that yours will arrive soon)
That is genius. Well done!
ResponderEliminarLas botellas te quedan ideales a cada lado de la puerta del comedor...un tutorial muy bueno.ay que sería de mí sin pintetest
ResponderEliminarQue tutorial más bueno. Tengo los materiales. Lo voy a hacer en cuanto pueda. Gracias
ResponderEliminar